Showing posts with label recipes. Show all posts

Saturday, March 17, 2012

Vegan Whipped Coconut Cream on Strawberries

Are you ready for the easiest vegan desert in the history of amazingly easy vegan deserts?!
Vegan Gluten Free and Unbelievable.
Yes. Yes you are.

This whipped topping is made from coconut milk and is completely dairy free, egg free, soy free. Vegan. So light and delicious. And only four simple ingredients. I have attempted this recipe a few times on a few different occasions and each time it just keeps getting better.

Coconut milk can frost a cake, for real.  
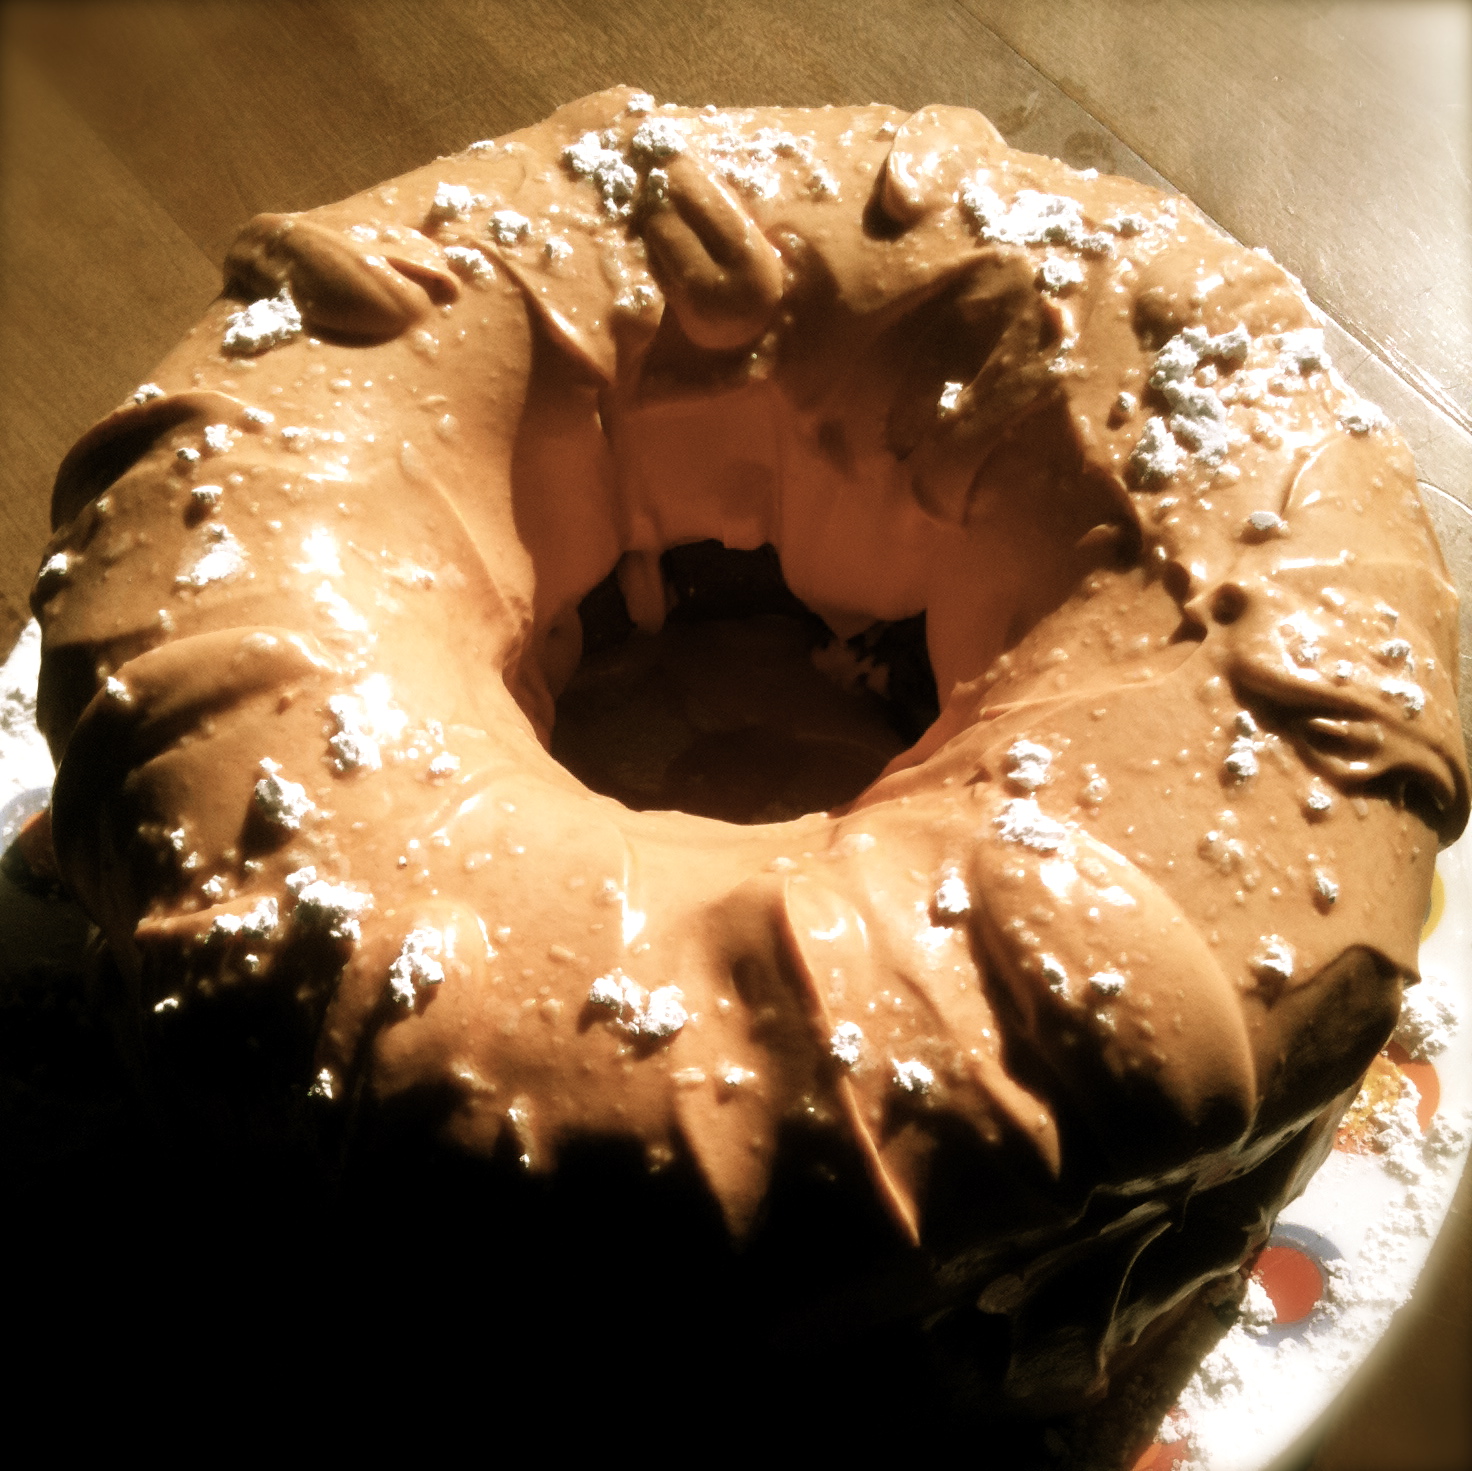
For my lovely friend Leslie's Autumn birthday I made a vegan gluten free pumpkin cake and used this recipe as the orange icing, it worked perfectly.
 
For Squeaky D's First Rainbow Birthday Party I used it to frost the rainbow cupcakes.

Cold Creamy Coconut Milk
And the other night I noticed the can of organic coconut milk I had in the pantry was about to pass the "Best Before" date. I popped it in the back of the fridge overnight. By morning the thick creamy coconut milk has risen to the top of the can and what little bit of coconut water that is left is at the bottom of the can. I scooped a spoonful into my coffee and decided to save the rest for this desert, perfect for a sunny spring day.

What I Used
1.5 cups sliced strawberries
Sugar or sweetener to taste (I used organic raw Agave Nectar)

1 can premium organic coconut milk
1 tbpsn icing sugar
1 tsp vanilla
small pinch of cinnamon

What I Did
Earlier in the day, I sliced up the strawberries, drizzled them in agave nectar, stirred them around in a small but deep bowl, and popped them in the fridge. The key is letting the strawberries soak in the sweetener and make that nice yummy syrup. I like to stir them (and taste them!) a few times over the course of the day. Hey! I never said it was healthy, I just said it was vegan.

 Just before serving, I took the can of coconut milk from the fridge and took extra care not to flip or shake it. When I opened the top to scoop off the thickened coconut milk into a bowl I was happy to see well over half the can was creamy and thick, which is why I buy the premium organic coconut milk. Once in a bowl I added the icing sugar, vanilla, and cinnamon and then using my mixer I whip it until it is light - very little time at all, really.
I take every excuse to use my vintage pyrex bowl.

We had more than enough whipped coconut cream for our strawberries in syrup that we dipped a few other fruits as well. This topping is so versatile, in coffees, hot chocolates, on cupcakes, or pancakes, pretty much worth trying on anything sweet!

Enjoy!

xoxox
Farren

Saturday, October 29, 2011

The Secret to great Sweet Potato Fries {rookie Recipe}

Remember weeks ago when I tweeted that I had discovered the secret to amazing and crispy home made sweet potato fries?

Yes. Just yes.
 Well. First, sorry that it has taken me so long to make the big reveal. And second, I lied. There isn't one secret, there are two. And one came about because of the other. A tangled web of delicious secret fries!

After chopping my humongous sweet potato into thick baby-hand-sized frenched fries, I debated between using olive oil or coconut oil to coat the fries and settled on what is now the first secret - Coconut Oil - to bake the fries. I set the oven to 350F and began to smear on the coconut oil, but the cool moist fries hardened the oil and it would not spread. This is when I realized I could parboil the fries, the second secret, in the mircowave for two minutes to heat the oil as well as seal in the tastiness! Huzzah! Parboiling the fries is really the difference between soft and crispy sweet potato fries.

As the fries came out of the microwave, I made sure each fry was coated in coconut oil and sprinkled on some cumin, fresh ground pepper, and mrs. dash, my most predictably favourite spice mix. I made sure to spread the fries out evenly, not a single fry was touching another fry, and left them in the oven around 25 minutes, until the ones around the edges were browned. This is where the little known half-secret comes in: don't add salt to your fries until after they come out of the oven.  You'll thank me afterwards.
More for Mama.
Unless you are Squeaky D. Because quite frankly, he hated the sweet potato fries.


Tuesday, October 25, 2011

Going dairy-free for my nursling was the easiest choice.

I spend a lot of time talking about gluten-free, dairy-free, egg-free, yadda yadda yadda-free eating. And this is why my recipes are gluten free and dairy free. It's not exactly my idea of the perfect diet, says the cheese-loving egg-nog-missing me. But it has been by far the best choice I could ever make for me and my family.

Allow me to explain.

Around August of 2009, I started to put two and two together (OMG, FOUR!) and realised that I was not healthy and in denial. For a large part of my adult life I had been sick and still did nothing about it. So I started reading. I talked to a doctor, I talked to many friends with similar afflictions, and I decided to reduce gluten in my diet.

I started feeling a lot better. I reduced it even further. I immediately noticed that my skin was better, my stomach felt better, I was less bloated, I didn't spend hours in the bathroom every morning. Within a month my depression had lifted. Within two months, my lady-cycle was regular.

After I became pregnant, I noticed anything gluten made me much sicker than before and completely stopped eating anything with gluten. Now even a slight slip up and I am violently ill.

Easy peasy, right?

I wish that were all. After the birth of my son (almost a full year ago? holy balls.) there was a steep learning curve. He threw us for a loop. Why was he always coughing, sputtering, and screaming? Why did his breath smell like acid, why does he hiccup all day and arch his back away from me when I try to nurse him? Don't babies like to nurse? The doctor diagnosed him with reflux, gave us a prescirption and sent us on our way. We used it, and it helped with the reflux, but not with the tummy pains. And definitely not with the mucousy, frothy green poops. Yeah, that's right, poop talk. I'll try to keep it limited.

All of this, of course, was accompanied with one very unhappy baby. So we searched for answers. Several mothers recommended eliminating certain things from my diet, especially dairy, so I played around with it and saw results. Three weeks off dairy completely and we were able to ditch the reflux medicine. This led me to try a full elimination diet, eating only rice, chicken, some vegetables and few fruits for two weeks, and then slowly re-introducing foods.

At first it was very apparent that Squeaky D reacted to dairy, egg, soy, and peanut, and at the time I also suspected beef, beans, citrus, and tomato, though I can thankfully eat those now!  Lately I have also stopped eating cashews and shellfish because of recent reactions. Some of these we have actually let him try, like egg, and he has had rashes across his face and chest almost immediately afterward. Scary.
Eczema Baby D - Still getting rid of dairy
For a long time I had nothing but the anecdotal experience of very wise Mamas to back me up, and a lot of defending to do about my diet and our restrictions to family and friends. I've been told to give it up and "just wean to goat's milk" because this all must be "fake" or "too hard." But then I read Dr Jay Gordon's article analyzing dairy protein allergy in children and nurslings and I felt vindicated. More and more literature supports nursing moms who decide to eliminate dairy and other foods from their diet.

And honestly. It hasn't been that difficult. There have been times when I have forgotten to read ingredients and had a slip up, and ohh boy. There is nothing inside me that wishes that kind of pain on my little boy, no amount of delicious applewood smoked gouda could convince me to go through the terror that the following two days (and three nights) would bring. No matter how drool-worthy.

So that is why all my recipes are weirdly dairy free. And egg free. And gluten free. And all that other stuff free. I have enjoyed the challenge of teaching myself to cook, especially within these interesting restrictions. And I love me a happy, healthy baby.

Tuesday, September 13, 2011

Home-made gluten-free Turkey Burgs! {Rookie Recipe}

Can we get it out of the way? Can we just say it?

Hamburgers are awesome. And apparently gluten free hamburgers are impossible to get right. In the last two years I have had very few truly amazing gluten free burgers. The problem is usually the bun.

Gluten free buns are bad, mmkay? They just are. They are hard when they should be soft or gooey when they should be fluffy. And they taste like wrong. Just wrong.

And even if the bun was even just alright, the patty is usually unseasoned. No barbecue sauce. Just a round puck of meat. Gross.

So obviously you could understand why a girl's gotta put her foot down and say Enough! I will make my own gosh darned gluten free burger and it will be INCREDIBLE YOU GUYS.

And? It was.
Most delicious burger of all time. OF ALL TIME!

What I used:

1 lb ground turkey
1 egg
1 package of Glutino Gluten Free crackers, pulverised.
1/2 an onion, finely chopped
4 cloves of garlic, finely chopped
1 tblspn of chopped dill
1 tsp oregano
1 tsp garlic powder
a dash of montreal steak spice

Romaine lettuce
hamburger fixins

What I did: 

Pulverising these crackers was harder than I thought it was going to be. I'm not a huge fan of Glutino Gluten Free Crackers for eating. They try to be Ritz crackers and fail. They are too crunchy and too sweet - perfect for cooking with. First I beat the crackers (inside their little "freshness" baggie) with my hands. But they would not be crushed. Then I beat them with a soup can. But, nope, they were still not interested in being crushed. So I got out my rolling pin and I let loose on those crackers like they done me wrong. For a good five minutes. And now I want a food processor very badly. But I crushed them real good.

I put two packages of ground turkey in a huge bowl, added the crackers, the egg, the onion, and the seasonings and mixed. Some people use their hands for this. I used a wooden spoon and a rubber spatula and probably looked like a fool but I did not have gooey raw meat on my hands so I feel like a winner and that is what counts

Amazing Tupperware Patty Press... things.
Once everything is really well mixed, I brought out my secret weapon: My mother's ancient Tupperware hamburger patty press set... thing. You take a spoonful of the ground meat, put it in the mold, and then use a press to flatten it and shape it into a patty. I'm sure it would be easy to do by hand, but baby - this patty press helps the burgs stick together on the grill so well. I'm glad I would not relent and give it up in the great Tupperware purge of ought-nine.

I stacked four patties on top of each other, separated by a small square of waxed paper. This is a great way to freeze them, in groups of four, so you can quickly defrost and grill some gluten free burgers on a whim - any time you like!

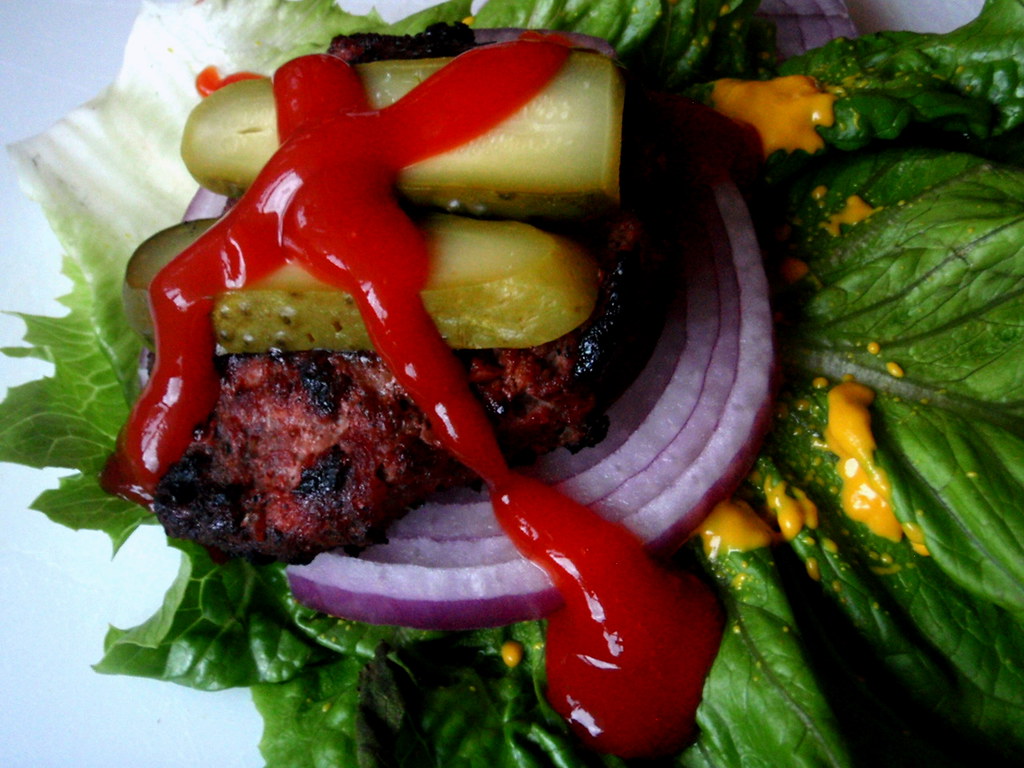
We decided to grill 6 burgers right away, topped them with pickles, red onion, mustard, and ketchup, and wrapped each burger in one or two romaine lettuce leaves. The lettuce wrap is actually AMAZING. Better than any gluten free bun you've ever tried, crisp, fresh, crunchy - and it doesn't fill you up so you can go ahead and have a second burger, guilt-free.

Can't wait to try turning this recipe into a meatloaf! I'll let you know how it goes.

Do you make your own burger patties? What are your favourite spices and ingredients?

Friday, September 2, 2011

Tangy Potato Salad

I love potato salad. Even the really bad, too much mayo, not enough potatoes, are there any spices in this? super bad potato salad.

But I'm dairy free. And I was egg free for so long, mayo has kind of lost it's sheen. So when we decided to host a mini bonfire and barbeque to celebrate the end of the summer, I went on a search for a new and awesome mayo-free potato salad.

And I found it on Pinterest. I freaking love Pinterest. At first I didn't get it. The hippie in me sarcastically drew conclusions (can hippies be sarcastic?) about another website encouraging mindless consumerism. Shop. Shop! SHOP!

But there is a lot more to pinterest. There are a tonne of tutorials and DIY projects, and I am ALL OVER THAT STUFF. Like patchouli on a hippie. Only I don't like patchouli. I'm obviously not a very good hippie.

But life gets a little more difficult with a baby around. And I've had such a hard time etching out space and time to get to all these crafty projects and recipes I've been pinning. In steps the magnificent Sarah Bartlett who informs me about a Pinterest Challenge. AND I CAN JOIN.


So here was my Pinterest Challenge submission. I decided to make this amazing potato salad recipe.

It is a naturally gluten free and dairy free and mayo free AND! Freaking delicious. Here is the recipe, originally found on GlutenFreeDay.com
Gratuitous use of my antique Pyrex nesting bowls.

What I used:
  • 1 package of organic baby potatoes, skin on.
  • 6 green onions from my garden
  • 6 tablespoons organic lemon juice
  • 12 tablespoons extra virgin olive oil
  • a bunch of finely minced fresh basil
  • 3 tablespoons of capers
  • salt and pepper to taste
What I did: 

I left the skin on the baby potatoes, but since I wanted them all to be bite-sized, I did have to chop a few in half or into thirds. I cooked them and let them cool while I mixed the olive oil, lemon juice, capers, and minced basil. I chopped up the onions and mixed everything together in a large bowl, making sure to coat everything. I added salt and pepper bit by bit - though a few guests decided to add more salt to their own bowls. I can be pretty stringy when it comes to salt!

Though I did leave this potato salad to sit for about an hour before serving, it was even MORE AMAZING the next day. Like, oh my god, I'm so sad there aren't more leftovers this is INCREDIBLE STUFF MY FACE NOM NOM NOM amazing. So. Try to have leftovers. 

Yay! First Pinterest Challenge Complete!  And Squeaky D seems to approve, too.
Yummmmmm.

xoxo
Farren


Thursday, July 14, 2011

Smoked Salmon Gluten Free Penne {Rookie Recipe}

I haven't done a recipe in a while but when I posted on twitter that I had made a gluten-free smoked salmon and mushroom penne with white wine dill sauce... people started asking how I made it.

And I have to admit. This is the best accident I have EVER thrown together. Ever. This meal turned out accidentally amazing and it is dairy-free, too. My go-to pasta yum sauce used to be pesto. Now it is this. Yes pasta yum sauce is a thing.

Gluten Free and Dairy Free and IMPROVISED? Unbelievable.


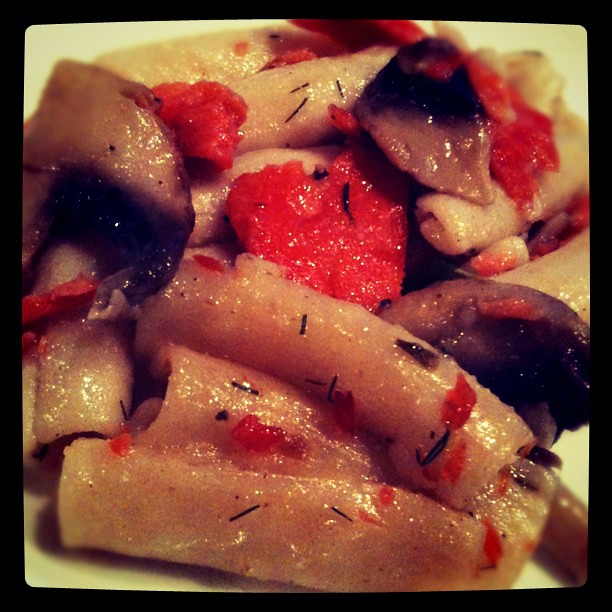
Smoked Salmon and Mushroom Gluten Free Penne in a white wine sauce.

What I used:
  • 1 Bag of Tinkyada Pasta Joy Brown Rice Flour Gluten Free Penne
  • 1/3 cup Extra Virgin Olive Oil
  • smoked salmon, sliced
  • fresh garden dill
  • fresh garden chives
  • sage
  • four cloves of garlic, minced
  • a handful of mushrooms
  • around a cup of white wine 
  • dill
What I did:
I always over cook the pasta. I happen to love over cooked brown rice pasta. But I reccomend you cook the pasta to your taste, strain and put it aside. In olive oil, saute the chopped fresh chives, and garlic. Add a sprinkling (or more) of sage, sliced mushrooms, and the smoked salmon, stirring over medium heat. Add white wine - I suggest starting small and adding more. Too much is too much, so go easy. As the white whine bubbles down, add the cooked pasta and fresh dill then stir until everything is coated.

Hell yes, right? So easy, so delicious, so simple. I'm having seconds right now.

Monday, April 4, 2011

Rookie Cooking: My first (sort of) Disaster

So I got in the kitchen and I made up my own concoction. I didn't even pretend to follow a recipe. I definitely proved myself to be a rookie cook.

The thing is? It was delicious. It was spectacular. I made BBQ Chicken Fingers, and I loved them. I made plenty and ate them over several days, and each day I felt more ill than the last. I knew the culprit was gluten.  

"Where could I be getting gluten?!" I wondered, I'd been so careful! I decided to scour ever ingredient of everything I'd eaten and checked one of the ingredients that I'd used for this recipe - which, yes, I am still going to share - when I discovered the word MALT.

Malt, my friends, is a secret ninja gluten enemy. It is made from barley, and makes me very very sick. That means I can't even have my favourite chocolate bar anymore - the Snickers with Almond.

So if you are gluten-free, do not eat this! 

But if you could go either way, then this was a fantastic success and I'd love to hear if you liked it.


The Supposed to be Gluten-free (but not!) "Breaded" BBQ Chicken Fingers

What I used:
  • Chili Sauce (I had half a jar sitting in the fridge I wanted to use)
  • Franks Red hot Sauce
  • Tabasco
  • 1.5 cups of corn flake crumbs (My nemesis supposed-to-be-gluten-free-but-wasn't ingredient!)
  • 1/4 tsp oregano
  • 1/4 tsp basil 
  • 1/2 tsp cayenne pepper
  • 1/2 tsp garlic powder
  • ground black pepper
  • Beware the evil Malt!
  • 4 chicken breasts cut into thin strips 
What I did:

I really just wanted to re-create that awesome breaded spicy chicken meal that I hadn't been able to find gluten-free in over a year, as well as use up some stuff that we had in our refrigerator. I went ahead pre-heated the oven to 350 degrees. I mixed half a jar of heinz chili sauce (around 1-1.5 cups) with one cup of Franks Hot Sauce (hey, I said spicy, so use less if you can't handle it) as well as a light sprinkling of tabasco. I put this all in a long and shallow glass dish.


In another long shallow dish I mixed the corn flake crumbs and spices. Now, I've used corn flake crumbs in other recipes to acheive a fake "breaded" taste and texture because I had been told that boxed crumbs were safe - while the breakfast cereal wasn't safe. Looking back, I cannot remember if I checked it myself before ever using it, but I paid the price and it reminded me to check every box before I dive in!

I cut the chicken breasts into strips, placed them in the first dish and coated them in the prepared sauce. I then moved them into the second dish, coating them in crumbs and spiced before placing them in a greased pyrex dish (I used olive oil for this) tight like little sardines. Some people prefer to shake their chicken in the crumbs using a ziplock bag, but I like to minimize my trash.

I put them in for 45 minutes and they came out perfect. Perfect and delicious and, for me, gluteny poisonous. Gloisonous.

My first Rookie Cooking Disaster. And I didn't even use Mrs. Dash this time!

Thursday, March 24, 2011

Rookie Cooking: Kale Chips

As a Rookie Cook I am just learning how to combine healthy foods in delicious ways. This week's lesson?

Kale Chips! Everyone who has ever made them raves about them, and here is why: It is all the yum of potato chips with zero guilt. They are crispy just like real chips. They can be flavoured just like real chips. AND! I ate them all in under an hour - just like real chips!

The first thing I did was look at a few recipes and settled on a method I liked. Kalyn's Kitchen had a great suggestion to make them in a ziplock bag, so that is what I tried.

Farren Square's Kale Chips
What I used:
  • A huge bunch of kale
  • 1.5 tablespoons of olive oil 
  • salt to taste
  • Mrs Dash
  • a large ziplock bag

What I did:
Pre-heat the oven to 300 degrees Fahrenheit. Remove the stem from the kale leaf, and tear it into chip-sized pieces.
Place Kale pieces, olive oil, and Mrs Dash into the ziplock bag. Squeeze out all the air and close tightly. Squish. Squish to your heart's content! Make sure every bit of kale is coated in olive oil, then spread the kale in a single layer on a large baking sheet and pop it in the oven. 
Yummy Kale ChipsI, uh... didn't set a timer. I just kept peeking every ten minutes. Just remember: When kale chips start to go brown, they tend to get a little bitter, so try to catch them while they are still green. Mine were in the oven a total of 30 minutes and lightly salted when they emerged. They were perfect!


Perfect enough to eat before I was able to snap more than one picture. These are a delicious gluten free, soy free way to snack! When I make these again, I'm going to save myself the ziplock bag and mix them in a bowl with a spatula or even my hands. If you have made kale chips before, leave a comment and let me know what spices / recipe / methods you have used! Next time I am definitely making dill pickle flavoured kale chips. Yum.

Sunday, March 13, 2011

Rookie Cooking: That Vegan Chickpea Dish

I'm a total rookie cook. That is, when it comes to cooking I have no idea what I'm doing. Sometimes I will be talking with a friend about what they like to make and I'll gasp inwardly: "You can DO that?"
Assistant Chef

So, as my fledgling family makes a start in this world, I am forcing myself to learn to cook. And then I'm going to blog about it. Even the mistakes. Hopefully there won't be too many mistakes... anymore. You are more than welcome to join me on my cooking journey! And of course, share your experiences and improvements on any recipe.

Right now I am personally gluten-sensitive which means that everything will be entirely gluten-free. I won't be using wheat or wheat flour, rye, barley, malt, or any of the other plethora of items with secret gluten, and I'll note which gluten-free brands I'm using. I'm also completely egg, peanut, and dairy free while I'm breastfeeding my son because he has shown to be sensitive.

My first meal was a success! I've made this recipe several times before but this was the most delicious version. Something we like to call

That Chickpea Dish (you know, the vegan one?)
I used:
  • olive oil
  • veggies:
    • 6-7 cloves of garlic, finely chopped
    •  a hunk of ginger the size of your thumb, finely finely chopped
    • 1 small onion, chopped
    • 2 cups sugar snap peas with tips cut off
    • 2 medium-large carrots sliced
    • 1 medium red pepper, chopped
    • 1/2 head of cauliflower, broken into small pieces
    • 2-3 leaves of kale
  • spices (each to taste):
    • cumin
    • coriander
    • oregano
    • freshly ground black pepper
    • mrs. dash (yeah, that's right, I'm admitting it)
  • One can organic chickpeas (organic is highly recommended, but whatever)
 What I did:
Heat the olive oil in a large frying pan and drop in the ginger, half the garlic, and onions. You can use less garlic than I did, but why would you want to? I immediately sprinkle cumin to cover the onions and garlic and add a dash of coriander. I let it be until the onions start looking like they might want to start getting soft.

Add the carrots, red pepper, snap peas. Stir it up so everything gets all glossy with olive oil. This is when I added the majority of spice - more cumin (I probably used about a tablespoon of cumin all together), a tiny bit more coriander, the ground pepper, the oregano, and the mrs. dash. I then added the cauliflower, kale, and the rest of the garlic. Adding more garlic later in cooking gives the dish a stronger garlic taste. Again, stir and mix until there is a light coating of olive oil on everything.

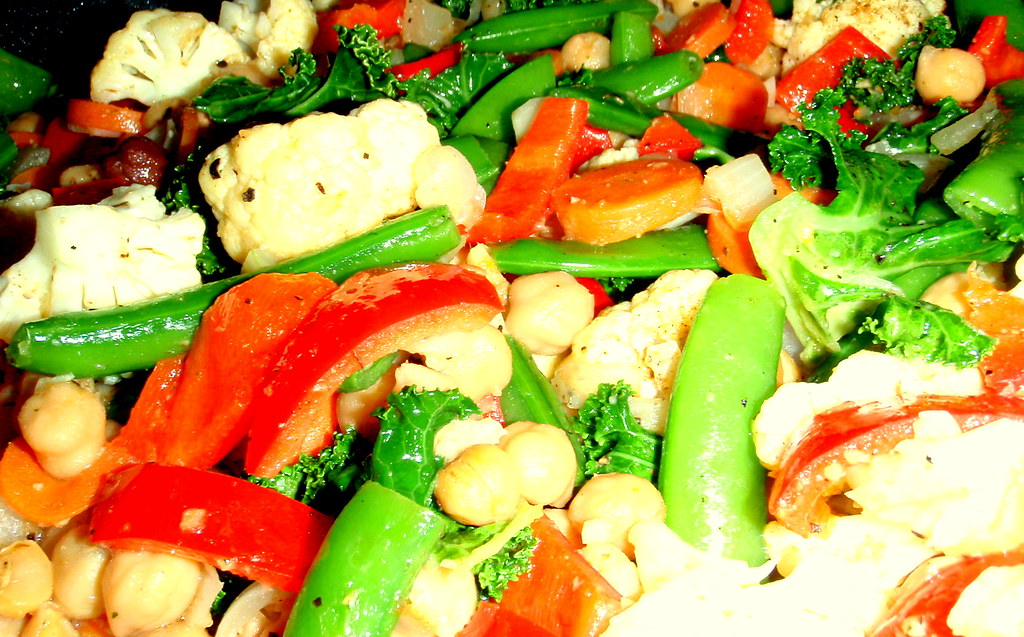
Mmm. Vegetables.
Rinse and drain the chickpeas (sometimes called Garbanzo beans), I usually rinse and drain twice and leave about 1/4 of the can in liquid **I only  recommend this if you are using organic chickpeas because that juice at the bottom? It's just chickpea juice and salt. But if you are using otherwise... well, I would rinse a lot more. Dump in the chickpeas and the extra water - just enough to cover the bottom of the frying pan - and add in little torn up pieces of kale. The kale and the chickpeas need barely any time to cook, so stir everything and watch closely. Once the kale is dark green and soft, remove the frying pan from heat and serve.

There you have it. A gluten-free, vegan meal that is delicious enough to stand on its own. I  have served this with rice, but honestly I love it best as-is. And my first meal on this journey towards super mega chefdom! Or something like that, hopefully.

Tuesday, March 1, 2011

Rookie Cooking: Learning to Cook like a Pro

I'm a total rookie cook. That is, when it comes to cooking I have no idea what I'm doing. Sometimes I will be talking with a friend about what they like to make and I'll gasp inwardly: "You can DO that?"


So, as my fledgling family makes a start in this world, I am forcing myself to learn to cook. And then I'm going to blog about it. Even the mistakes. Hopefully there won't be too many mistakes... anymore. You are more than welcome to join me on my cooking journey! And of course, share your experiences and improvements on any recipe.

Right now I am personally gluten-sensitive which means that everything will be entirely gluten-free. I won't be using wheat or wheat flour, rye, barley, malt, or any of the other plethora of items with secret gluten, and I'll note which gluten-free brands I'm using. I'm also completely egg, peanut, and dairy free while I'm breastfeeding my son because he has shown to be sensitive.


If you have any suggestions on what I should make, please leave a comment! And you can also see the recipes I have already attempted here.


Wish me luck!


xoxo
Farren Square