
To tell you about my craft space, first I have to tell you a bit about my apartment. I love my apartment. But not for the size, or the landlord, or the arrangement, or the way the kitchen appliances are over 35 years old and the colour of crusty mustard. Though that last one grows on me more and more with each addition of blue kitchen-ware. I am in love with the location and the relatively inexpensive rent, considering I live very central in a pretty large city. The building is sinking and I hear sirens, traffic, and wanderers at night - but the people who live in this neighbourhood are so diverse, interesting, and mostly harmless - anything less just wouldn't be home to me, now.
I had a lot of fun organizing everything and learned a lot for next year - as I definitely seem to be the kind of crafter who collects odds and ends with the hopes of doing something fruitful with it another time - hence the 200 issues of National Geographics. Ha.
Here are some of the little tidbits that made my re-organization successful, pleasurable, and efficient:
1) Start with five piles or boxes: things to keep, things that need a "forever home," things to recycle, things to give away, and things to throw away. Be ruthless. If you don't do it now, it will just haunt you later. Get rid of your trash, recycle, and give-away boxes immediately, don't look back!
 2) Once you have figured out what is staying in your craft space, spread it out in front of you. Dump out drawers, open all your boxes, empty all your kits and cases. Start to really consider your art.
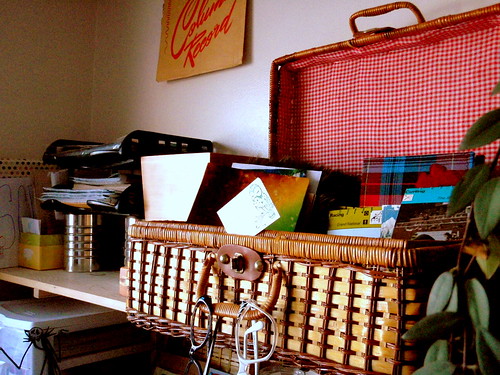
3) This is where it gets personal. Think about your own method. What works for you? What is important to keep you motivated? I like sunshine and plants, so I made sure that was a part of my craft space. I found an absolutely gorgeous vintage picnic basket and decided to use it to store unsold finished projects, and soon after stumbled about a vintage child's toy picnic basket which worked perfectly as an area just for my unfinished projects, as I can't stand constantly putting them completely away.
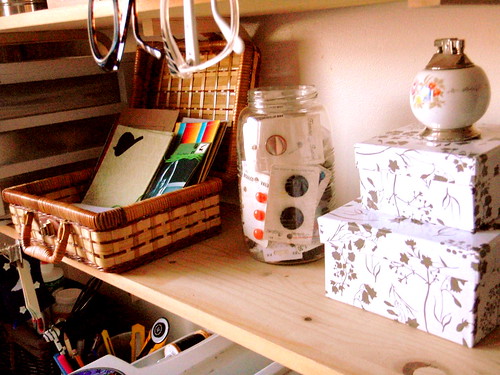
 4) Group like with like. This is a great way to visualize how much space everything really does use. I put all my scissors and art knives together, all my different glues and adhesives together. My elastic and ribbon, my thread and bobbins, vintage buttons, stamps, everything went into little piles all over my table and floor - I pulled out every photo box, every old jar, vintage make up case, wicker basket, pencil box, or antique tin I had lying around to see what might fit where. Other ideas to contain your supplies include napkin holders, cake platters with domes, and envelope books. Etsy.com is a great place to look for items such as these!
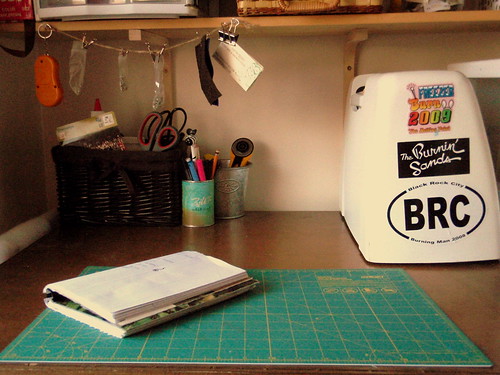
 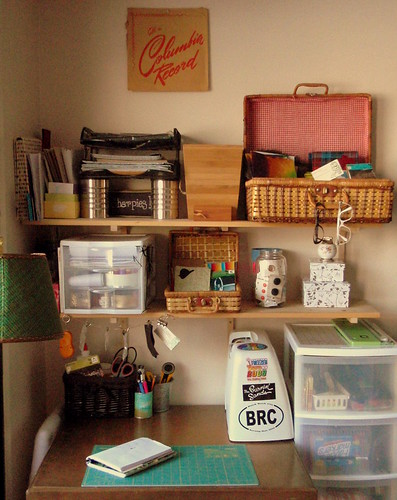 5) Don't forget to think outside the box, too! I'm very visual and tactile, I like to see and be able to touch all my supplies immediately. Everything that I use often found a spot directly on my table or closest shelf. My top drawers reserved for items I reach for most - but I also decided to hang a few things - like an envelope to hold recent receipts until I can file them as well as small butterfly clips on a string so that I can hang baggies of earring hooks, snaps, and brads. I make my own patterns, so I finally made them each their own envelope and then drew the garment on the front of the envelope in neat sharpie colours and slid them all into their own little box.
 6) Be comfortable in your own space. Stick to a style you love. I love warm, open, and cozy spaces and wanted my tiny craft nook to reflect that style. And I wanted it to be a place where I love to spend time. Mission Accompli!
For me, this organization project was at first a daunting task that turned out to be a lot of fun and didn't quite take the effort I was expecting. It can be very inspiring to see all the supplies, colours, and tools to have at one's disposal! Good luck to everyone launching their own organization project, I think you will find that a clear space translates to a clear mind - which really lets those great ideas sparkle through. Shine on you crazy diamonds, Shine on!
Great Article Farren. I really enjoyed reading it.
ReplyDelete